Leak Testing

Leak Testing

Non Destructive Examination (NDE)

Non Destructive Examination is the act of  evaluating a welded component (or material to be welded) without affecting the serviceability of the part or material

  • All Welds have flaws.
  • Another name for a flaw is a discontinuity
  • Discontinuities are interruptions in the normal crystalline structure (or grain) of the metal.
  • Discontinuities are NOT always defects
  • The purpose of welding inspections is to locate and determine the size of any discontinuities
  • Discontinuities that are to large or repeat too often within the weld become defects
  • Defects will compromise the welds overall strength

What are some common defects

  • Porosity
  • Undercutting
  • Rollover or “Cold Lap”
  • Slag inclusion
  • Poor penetration
  • Voids
  • Hydrogen Embrittlement

What is Leak Testing?

Leak testing is a process used to detect manufacturing defects which helps verify the integrity of products and improve consumer safety.

For example, the automotive industry consistently uses leak testing to verify that assembly operations were completed properly and subcomponents are leak free.

These leak testing procedures are defined and specified by a variety of standard organizations.

For the automotive industry, these include requirements from the American Society for Testing and Materials (ASTM) and the Society of Automotive Engineers (SAE), as well as, many OEM internal specifications.

Manufacturers that produce parts that contain gas or liquid, need to know if their products include any defects that could allow leakage.

Defective products can be costly due to increased warranty claims and potentially endangering consumer safety.

A main component of many leak testing methods is the concept of leak flow, which refers to the leakage of a gas or liquid from the product.

There are several methods available for leak testing a product. The most appropriate test method for each application depends on several items:

  1. Purpose of the testing (criticality to detect defect)
  2. Leak rate specification (very crucial parameter that can direct a test method alone)
  3. Test cycle time (production cell test time)

We offers our patented Micro Flow Technology for leak testing.

This method is based on the mass conservation law.

The Intelligent Gas Leak Sensor, or IGLS, inside the leak test instrument will measure the flow rate of gas entering the test part (unit under test, UUT) from a reservoir as gas is leaking out of the UUT.

The incoming flow rate at a steady state condition is equal to the amount of mass leaking out.

This allows the leak tester to directly measure leaks with better accuracy and faster cycle times than other air leak test methods.

Each product/application may have its own distinct process parameters.

We can provide the tools to help implement a leak testing program, from defining your leak specification to designing and building a custom test system.


Magnetic Particle Testing


Magnetic Particle Testing

Magnetic Particle Testing (Questions)


  1. Which of the following is not a property of magnetic lines of force?

(a) They form closed loops which do not cross

(b) The density increases with distance from the poles of a permanent magnet

(c) Hey are considered to have direction

(d) They seek paths of least magnetic resistance or least reluctance


  1. Surrounding an electromagnet, the magnetic field is strongest:

(a) Immediately after the current ceases to flow

(b) While the magnetizing current ceases to flow

(c) At the time the magnetic particles are applied to the part

(d) Just prior to current reversal


  1. The value of permeability is:

(a) A fixed value depending upon the type of material

(b) Between 1 and 100 for all ferromagnetic materials

(c) Between 0 and 10 for all ferromagnetic materials

(d) Dependent upon the amount of magnetizing force necessary to overcome

Saturation


  1. The flux density of the magnetism induced by a coil is affected by:

(a) The coil size

(b) The current in the coil

(c) The number of turns in the coil

(d) All of the above


  1. How many turns of a coil will be needed to establish a longitudinal field in a steel

shaft that is 22.86 cm (9 inches) long and 7.62 cm (3 inches) in diameter? 3000

amperes magnetizing current is available, it is desired to magnetize the part in

accordance with the formula NI = 45,000/(L/D):

(a) 1

(b) 3

(c) 5

(d) 7

  1. How many ampere-turns are required to magnetize a part that is 40.6 cm (16 inches)

long and 5 cm (2 inches) in diameter?

(a) 9000 ampere-turns

(b) 5625 ampere-turns

(c) 2812 ampere-turns

(d) None of the above


  1. The lines of flux or force in a circularly magnetized ferromagnetic bar:

(a) Are aligned through the piece from the south to the north pole

(b) Are aligned through the piece from the north to the south pole

(c) Leave the south pole and enter the north pole

(d) Are contained within and around the part


  1. In which magnetizing method is the current passed directly through the part, thereby

setting up a magnetic field at right angles to the current flow?

(a) Longitudinal magnetization

(b) Coil magnetization

(c) Central conductor magnetization

(d) None of the above


  1. Which of the following is false concerning a magnetic field in and around a hollow

conductor as compared to that of a solid conductor of the same outside diameter when

both are of the same magnetic material, and when the applied current is the same?

(a) The field immediately outside the outer surface of the hollow conductor is

greater

(b) The field gradient inside the hollow conductor is steeper

(c) The fields outside the conductors are the same

(d) The fields are the same at the centre


  1. The field in a section of ferromagnetic pipe being magnetized by means of a central

conductor is strongest at the:

(a) Ends of the pipe

(b) Outer surface of the pipe

(c) Inner surface of the pipe

(d) The field is uniform at all places

  1. For a 7.6 cm (3 inches) diameter bar how much current is needed to magnetize the bar

for the detection of longitudinal discontinuities:

(a) 5500 amperes

(b) 16500 amperes

(c) 1000 amperes

(d) 3000 amperes


  1. For detection of longitudinal discontinuities a 7.6 cm (3 inches) diameter bar is

magnetized in:

(a) The longitudinal direction

(b) The circular direction

(c) The clockwise direction

(d) None of the above directions


  1. A bar that is 5 cm (2 inches) by 10 cm (4 inches) by 30.5 cm (12 inches) is being

magnetized in the circular direction. About how many amperes are required using the

perimeter approach?

(a) 2200

(b) 4500

(c) 3800

(d) None of the above


  1. An advantage of AC is that:

(a) It is most readily available

(b) Equipment can be made lighter

(c) It leaves the part demagnetized

(d) All of the above


  1. When a magnetic field cuts across a crack:

(a) Electrons begin jumping back and forth across the crack

(b) The crack begins to heat up

(c) Magnetic poles form at the edges of the crack

(d) All of the above

  1. A disadvantage of AC current is that it:

(a) Cannot be used with dry powder

(b) Has poor penetrating power

(c) Can only provide low flux densities

(d) Cannot be used for residual magnetic particle testing


  1. What causes a leakage field in a steel bar?

(a) A crack

(b) Reversal of the magnetic field

(c) Paint on the surface

(d) All of the above


  1. An indication is a defect under which of the following conditions?

(a) If it is greater than 3.8 cm (1.5 inches) long

(b) If it exceeds the limits of a standard or specification

(c) If it is deep

(d) Under all of the above indications


  1. Paint will not affect the detection of a crack if:

(a) The paint is thick and the defect is subsurface

(b) The paint is thin and the crack is parallel to the direction of flux lines

(c) The crack is sharp and the paint is thin

(d) All of the above


  1. A magnetic particle indication is sharp and very fine; this suggests that the

discontinuity is:

(a) Subsurface seam

(b) A shallow, tight surface crack

(c) Porosity

(d) A deep crack

  1. Among the following, the best type of current for the detection of fatigue cracks is:

(a) Half-wave direct current

(b) Alternating current

(c) Direct current

(d) Half-wave alternating current


  1. Continuous magnetization provides the most sensitivity because:

(a) The magnetic particles are present while the part is being magnetized

(b) The magnetic field is greatest while the magnetizing current is on

(c) All of the above

(d) Neither of the above


  1. The sensitivity of magnetic particle testing is greatest when the discontinuity is:

(a) Parallel to the direction of the magnetic flux lines

(b) Perpendicular to the flow of the magnetizing current

(c) Perpendicular to the direction of the magnetic flux

(d) Perpendicular to the line between prods


  1. To provide reliability and reproducibility in magnetic particle testing, written

procedures should include:

(a) Location of the coil and current for each magnetization

(b) Requirements for ammeter calibration

(c) Type and concentration of the particles

(d) All of the above


  1. The magnetic particles are noticed to bunch in some fillet areas and stand on end on

the edge of a part being magnetized. These observations indicate that the:

(a) Particle concentration is too low

(b) Flux density is excessive

(c) Flux density is too low

(d) Magnetizing current should be changed form AC to DC

  1. Flux density is a measure of the number of magnetic flux lines perpendicular to an

area of cross-section. If a discontinuity is in the plane of the unit area, the strongest

magnetic article indication will be formed when the discontinuity is:

(a) Inclined at 45º to the flux lines

(b) Parallel to the flux lines

(c) 90º to the flux lines

(d) 135º to the flux lines


  1. Prods are being used to magnetize a weld area. When dry powder is dusted on the

surface, it is observed that there is no mobility of the particles. What is the most

probable reason for this observation?

(a) The magnetizing current is not high enough

(b) The flux density is too low

(c) DC is being used

(d) All of the above are possible reasons


  1. The current from portable high amperage units can be applied to the object using:

(a) Prods

(b) Cable coils

(c) Pre-wrapped coils

(d) All of the above


  1. How can parts be tested to determine if they have been adequately demagnetized?

(a) By bringing a suspended paper clip near the middle of the part

(b) By using a small horseshoe permanent magnet

(c) By using a small magnetometer held at a corner of the part

(d) By sprinkling some magnetic particles on the part


  1. The statement ‘magnetic particle testing can be applied to plated and painted parts’.

(a) May be true depending upon the thickness of the coating

(b) May be true if flux densities are increased to compensate for the coating

thickness

(c) Is true only for circular circumstances

(d) Both (a) and (b)

  1. A group of indications, some sharp and some broad and fuzzy, were found on an area

of a small forging. Demagnetization and re-inspection eliminated these indications.

What was the probable cause?

(a) Forging lap

(b) Magnetic writing

(c) Change in permeability

(d) Subsurface variation


  1. Magnetic particle testing is most likely to find subsurface discontinuities in:

(a) Soft steels with high permeability

(b) Soft steels with low permeability

(c) Hardened steels with low permeability

(d) Hardened steels with high permeability


  1. Which of the following is not an advantage of Magnetic Particle testing?

(a) Fast and simple to perform

(b) Can detect discontinuities filled with foreign material

(c) Most reliable for finding surface cracks in all types of material

(d) Works well through a thin coat of paint


  1. Which of the following does not represent a limitation of Magnetic Particle testing?

(a) The type of materials which may be effectively tested

(b) The directionality of the magnetic field

(c) The need for demagnetization

(d) The ability to detect discontinuities filled with foreign material


  1. The most effective NDT method for locating surface cracks in ferromagnetic materials

is:

(a) Ultrasonic testing

(b) Radiographic testing

(c) Magnetic particles testing

(d) Liquid penetrant testing

  1. A discontinuity which is produced during solidification of the molten metal is called:

(a) Inherent

(b) Processing

(c) Service

(d) None of the above


  1. Pipe would be classified as what type of discontinuity?

(a) Inherent

(b) Processing

(c) Service

(d) None of the above


  1. A seam would be classified as what type of discontinuity?

(a) Inherent

(b) Processing

(c) Service

(d) None of the above


  1. A lamination in steel plate would be classified as what type of discontinuity?

(a) Inherent

(b) Processing

(c) Service

(d) None of the above


  1. An internal rupture caused by working steel at improper temperatures is called a:

(a) Lap

(b) Cold shut

(c) Forging burst

(d) Slag inclusion

  1. Cracks which are caused by alternating stresses above a critical level are called:

(a) Stress corrosion cracks

(b) Cycling cracks

(c) Critical cracks

(d) Fatigue cracks


  1. Cracks which are caused by a combination of tensile stress and corrosion are called:

(a) Stress corrosion cracks

(b) Cycling cracks

(c) Critical cracks

(d) Fatigue cracks


  1. Which of the following are ferromagnetic materials?

(a) Aluminium, iron, copper

(b) Iron, copper, nickel

(c) Copper, aluminium, silver

(d) Iron, cobalt, nickel


  1. The reverse magnetising force necessary to remove a residual magnetic field from a

test piece after it has been magnetically saturated is called:

(a) Hysteresis

(b) Coercive force

(c) Demagnetising flux

(d) Reverse saturation


  1. Magnetic lines of force enter and leave a magnet at:

(a) Saturation

(b) L/D ratios of greater than 4 to 1

(c) Flux concentration points

(d) Poles

  1. The ease with which a magnetic field can be established in a test piece is called:

(a) Reluctance

(b) Retentivity

(c) Permeability

(d) Electromagnetism


  1. Opposition to establishment of a magnetic field in a test piece is called:

(a) Reluctance

(b) Retentivity

(c) Permeability

(d) Electromagnetism


  1. The ability of a material to remain magnetic after the magnetising force is removed is

called:

(a) Reluctance

(b) Retentivity

(c) Permeability

(d) Electromagnetism


  1. A magnetic field which is contained completely within the test piece is called a:

(a) Confined field

(b) Longitudinal field

(c) Circular field

(d) Saturated field


  1. Which of the following produces a circular field?

(a) Coil

(b) Head shot

(c) Yoke

(d) All of the above

2 d

3 a

4 d

5 c

6 b

7 d

8 d

9 c

10 c

11 d

12 b

13 c

14 d

15 c

16 b

17 a

18 b

19 c

20 b

21 b

22 c

23 c

24 d

25 b

26 c

27 d

28 d

29 c

30 a

31 b

32 a

33 c

34 d

36 a

37 a

38 b

40 c

41 d

42 a

43 d

44b

45 d

46 c

47 a

48 b

49 c

50 d

To know more details please click here

API 1169 Training

API 1169 Training

API 1169 – Pipeline inspector

API 1169 training

API 1169 training

Description:

  • This is an intensive 3 days course to prepare you to pass the API 1169 certification exam that has been recently launched by API.
  • The Technical Toolboxes, Inc. API – 1169 Exam Prep Course covers all information in the current API 1169 Pipeline Inspector Certification program “Body of Knowledge.”
  • This program has been developed to provide full coverage for the API certification exam in the context of the API multiple choice exam format.
  • The training will be invaluable in preparing you for the exam and providing you with an edge to passing.
  • Students will be assigned homework for evening study and practice questions and a practice exam will be given.
  • The instructor has taken and passed the exam. This 3 days class covers American Codes only.

Objective:

Preparation to pass the API 1169 Exam.

Students should bring the following documents with them . TTI does not provide these for the students.:
After the description of the instructor below there is a link to the API 1169 Exam Publication Effectivity Sheet for 2016. Attendees bring everything on page 1. Technical Toolboxes will provide everything on page 2 in electronic format, or you may bring a hard copy if you wish. Below is the same list.

API 1169, Basic Inspection Requirements – New Pipeline Construction
All of API 1169 is applicable to the examination

API 1104, Welding of Pipeline and Related Facilities
ATTN: Test questions will be based on the following portions of the document only:
Section 3, Terms, Definitions, Acronyms, and Abbreviations
Section 4, Specifications
Section 5, Qualifications of Welding Procedures with Filler Metal Additions
Section 6, Qualification of Welders
Section 7, Design and Preparation of a Joint for Production Welding
Section 8, Inspection and Testing of Production Welds
Section 9, Acceptance Standards for NDT
Section 10, Repair and Removal of Weld Defects
Section 11, Procedures for Nondestructive Testing (NDT)

API 1110, Pressure Testing of Steel Pipelines –
Entire document is subject to testing with exception of the appendices

API Q1, Specification for Quality Programs
ATTN: Test questions will be based on the following portions of the document only:
Section 3: Terms, Definitions and Abbreviations
Section 4: Quality Management System Requirements
Section 5: Product Realization

ANSI Z49.1 Safety in Welding, Cutting, and Allied Processes
ATTN: Test questions will be based on the following portions of the document only:
Chapter 4: Protection of Personnel and the General Area
Chapter 5: Ventilation
Chapter 6: Fire Prevention and Protection
Chapter 8: Public Exhibitions and Demonstrations

ASME B31.4, Pipeline Transportation Systems for Liquids and Slurries
ATTN: Test questions will be based on the following portions of the document only:
Chapter I, Scope and Definitions
Chapter II, Design
Chapter III, Materials
Chapter V, Construction, Welding, and Assembly
Chapter VI, Inspection and Testing

ASME B31.8, Gas Transmission and Distribution Piping Systems
ATTN: Test questions will be based on the following portions of the document only:
General Provisions and Definitions
Chapter I, Materials and Equipment
Chapter II, Welding
Chapter III, Piping System Components and Fabrication Details
Chapter IV, Design, Installation and Testing
Chapter VI Corrosion Control

CGA (Common Ground Alliance) Best Practices, 11.0 Edition, March 2014
Entire document is subject to testing

INGAA, Construction Safety Guidelines
Natural Gas Pipeline Crossing Guidelines, Version 1, June, 2013 (http://www.ingaa.org/File.aspx?id=20405)
Section II – Definitions
CS-S-9 Pressure Testing (Hydrostatic/Pneumatic) Safety Guidelines, September, 2012 (http://www.ingaa.org/File.aspx?id=18981)
Entire document is subject to testing

ISO 9000:2005 Quality Management Systems – Fundamentals and Vocabulary 3rd edition (confirmed in 2009).
ATTN: Test questions will be based upon the Definitions Only

Technical Toolboxes will provide the below in electronic format. You may bring your own print version if you wish.

Who Should Attend:

Those planning on sitting for the API 1169 Certification Examination
Pipeline Welding Inspectors, Pipeline Welding Engineers,, Pipeline Welding Supervisors, NDT personnel, and those who wish to understand pipeline QA/QC.

To know more details please click here


API 653 Questions and Answers

API 653 Questions and Answers


1)         __________ is a change from previous operating conditions involving different properties of the stored product such as specific gravity or corrosivity and / or different service conditions of temperature and / or pressure”

(a) Re-rating;                                                 (b) Change in service;

(c) Repair;                                                      (d) Reconstruction

REF : API-653, – 1.5.4

ANS : (b)

2)         A __________ is a device used to determine the image quality of a radiograph.

(a) A step wedge comparison film;                        (b) A densitometer;

(c) A penetramter                                         (d) All of the above.

REF : Section V, T-233

ANS : (c)

3)         A corroded roof plate is found to have an average thickness of 0.1″ measured over an area of 100 sq. inches. This area shall be :-

(a) Repaired or replaced;                            (b) Found to be acceptable;

(c) Repair is prohibited;                               (d) Replacement is mandated

REF : API-653, 2.2.1.2

ANS : (b)

4)         A double-welded butt joint is defined as :-

(a) A joint between two members that intersect at an angle between 0 degrees (a butt joint) and 90 degrees (a corner joint).

(b) A joint between two abutting parts lying in approximately the same plane that is welded from both sides.

(c) A joint whose size is equal to the thickness of the thinner jointed member.

(d) A joint  between two  overlapping members in which the overlapped edge is welded.

REF : 650 3.1.1.1

ANS : (b)

5)         An external floating roof shall be provided with atleast one manhole having a minimum inside diameter of __________ inches.

(a) 18;             (b) 15;             (c) 24;             (d) 30.

REF : 650 APP. C. 3.11

ANS : (c)

6)         A formal Visual External inspection by a qualified inspector shall be done atleast :-

(a) Every 5 years of ¼ CR life whichever is less

(b) Every 5 years of ½ CR life whichever is less

(c) Every 2 years

(d) Every 1- years or ¼ CR life whichever is greater

REF : 653 4.3.2.1

ANS : (a)

7)         A full hydrostatic test (when required) shall be held for __________ hours :-

(a) 24;             (b) 8;               (c) 18;             (d) 12

REF : 653 10.3.1.1

ANS : (a)

8)         A full-fillet weld is a weld that :-

(a) not less than 1/3 the thinner plate;

(b) the legs equal the thickness of the thinner plate;

(c) the largest isosceles triangle that can be inscribed within the cross section of the weld

(d) is atleast the thickness of the thicker plate

REF : API 650 3.1.1.7

ANS : (b)

9)         A hot tap in a 1.25″ thick tank with a minimum metal temperature of 65oF at time of hot tap, without having material toughness data is :-

(a) not permitted;                                          (b) permitted

(c) not enough information;                                   (d) not addressed by the code

REF : API 653 – 7.13.4 & Fig. 7-5

ANS : (a)

10)      A hydrostatic test for a relocated tank :-

(a) may be waived by the Owner / Operator;                   (b) is required;

(c) may be waived by the Inspector;                                 (d) is not necessary

REF : 653 10.3.1.1 (a)

ANS : (b)

To know more details about API 653 click here


API 580 Questions and Answers

  1. What is design ?

The act of working out the form of  some thing (as by marking a sketch  or out line or plan )

  1. What is design interpretation?

Design interpretation means to interpret or under stand the drawing.

  1. Introduction to pressure vessel

Several types of equipment, which are used in the chemical, petrochemical fertilizer industries are described bellow.

  • Pressure vessel
  • Storages vessel
  • Distillation column
  • Heat exchanger
  • Evaporator
  • Reactor, etc.

In all this equipment pressure vessel is a basic and generally used in all     above types of industries.Pressure vessel are usually spherical or cylindrical with domed ends. They are provide with openings or nozzles with facilities for marking  threaded or flanged joints. Various methods are used for supporting the vessel.

  1. Definition of vessel

A container or structural envelope in which material are processed, or stored.

  1. Definition of pressure vessel

A container or structural envelope in which material are processed, treated, or stored which has been designed to operate at pressure above 15 Psi are knows as pressure vessel.

  1. Which codes used make design of pressure vessel?

Various code reference which is used  for design and construction of pressure vessel are as below.

  • ASME sec viii div-1
  • IS 2825
  • BIS 5500
  1. Why designing is required for  pressure vessel?

The selection of the types of vessel based primarily upon the fictional service of the  vessel. The functional service requirements impose certain operating conditions such as temperature, pressure, dimensional limitation and various loads.

If the vessel is not designed properly the vessel may be fail in service. The design of most structure is based on formulas. Formula may be used form any relative code/standards so the value derived form that formula is reliable.

  1. Why necessary design of pressure vessel?

If vessel is not designed properly’ the vessel may be fail in service.

Failure may be occur in one or more manners such by the plastic deformation resulting form excessive stress, or by elastic instability.

  1. What parameter affect the failure of vessel?

Failure may also result form corrosion, wear or fatigue. Design of the vessel to protect against such as failures involve the consideration of these factors and the physical properties of the materials.

If the vessel is not properly designed then chances of failure is more because we don’t know what is the maximum operating pressure and temperature. We don’t know about maximum load, pressure or temperature carrying capacities of the vessel.

10 . Stresses in pressure vessel

Pressure vessel are subjected to various loading which exert stresses of  different intensities in the vessel components.

The various stresses, which are generating during working and service time, are tabulated below.

API 580 :

Risk-Based Inspection was initiated and managed by the American Petroleum Institute (API) within the refining and petrochemical industry:

  • API RP 580 Risk-Based Inspection RBI
  • API RP 581 Risk-Based Inspection RBI Technology(Only Introduction Not for Examinations)

API RP 580 introduces the principles and presents minimum general guidelines for developing a RBI program for fixed equipment and piping. API RP 581 provides quantitative RBI methods to establish an inspection program. Together, these two documents comprise a widely-recognized standard for industry-accepted RBI practices.

This API training course helps attendees understand and use RBI Risk Based Inspection technology, develop a program, and learn which RBI Risk Based Inspection  procedures and working processes comply with industry standards.

The calculation of risk in API RBI Risk Based Inspection involves the determination of a Probability of Failure combined with the Consequence of Failure. Failure in API RBI is defined as a loss of containment from the pressure boundary resulting in leakage to the atmosphere or rupture of a pressurized component. As damage accumulates in a pressurized component during in-service operation the risk increases. At some point, a risk tolerance or risk target is exceeded and a more effective inspection is recommended to better quantify the damage state of the component. The inspection action itself does not reduce the risk; however, it does reduce uncertainty thereby allowing better quantification of the damage present. API Risk Based Inspection RBI technology systematically factors risk into inspection decision-making, helping identify areas of vulnerability by confirming equipment condition, identifying damage mechanisms and rates, and predicting Probability of Failure. The outputs of a Risk Based Inspection RBI study help plant personnel make more informed decisions and target inspection dollars where they are needed most and more effectively manage reliability.


API 570 Questions

                                                     API 570 Questions

1.In the Barlow formula for determining pipe thickness, the term S stands for

  • Internal design gage pressure of the pipe in psi
  • Pressure design strength for internal pressure, in psi
  • Allowable unit stress at the design temperature, in psi
  • Maximum strain at the average operating temperature, in psi


2.At low pressure and temperature, the thickness determined by the Barlow formula may  be so small that  the pipe would have _________________ structural strength

  • Adequate
  • Insufficient
  • Ample
  • Good


3.A seamless NPS 12, A-106 Grade A pipe operators at 300 degrees F and 941 psi. The allowable stress is 16000 psi. Using the Barlow Equation, determine the thickness required for these conditions

  • 0.375”
  • 0.750”
  • 0.353”
  • 0.706”

4.A seamless NPS6, A-106 Grade A pipe operators at 300 degrees F and 941 psi. The allowable stress is 16000 psi . The owner-user specified that the pipe must have 0.1” allowed for corrosion allowance. Using the Barlow Equation, determine the thickness required for these conditions

  • 0.706”
  • 0.277”
  • 0.195”
  • 0.295”

5.A seamless NPS8, A-53 Grade B pipe operators at 700 degrees F and 700 psi. The allowable stress is 16500 psi . The pipe has been in service for 6 years. The original wall thickness of the pipe was 0.375”. The pipe wall now measure 0.30” Considering no structural requirements, estimate how long the piping can continue to operate and not be below the minimum thickness

  • 4.68 years
  • 9.8 years
  • 0 years; pipe now below minimum
  • 10.42 years


6.An Inspector finds a thin area in the body of a NPS 8 (8.625” O.D.) 600# gate valve. The valve’s body is made from ASTM A216 WCB material. The system operates at 700 psi and 750 degrees F. Using a corrosion allowance of 0.125”, what thickness must be present in order to continue to safely operate ( Hint 1.5 x 8.635 x 600/ 2 X 7000  +  0.125 )

  • 0.48”
  • 0.68”
  • 0.51”
  • 0.43”


7.If corrosion or erosion is anticipated for a valve, what should be done prior to installing the valve?

  • Severance thickness determinations should be made when the valves are installed so that the fretting rate and metal ruination can be determined
  • Retirement thickness measurement should be made after installation so that the fatigue rate and metal loss can be determined
  • Reference thickness measurements should be made when the valves are installed so that the corrosion rate and metal loss can be determined
  • Retina measurements of the macula should be made when the iris’ are installed so the optical rate and losses of perception can be determined


8.Which of the items listed below would NOT normally be contained in inspection records of piping?

  • Original date of installation, the specifications and strength levels of the materials used
  • Original vessel hydrotest pressures and conditions that the tests were performed  under
  • Original thickness measurement and the locations and dates of all subsequent readings
  • Calculated retirement thicknesses


9.Accurate records of a piping system make possible an evaluation of _____________ on any piping, valve or fitting

  • Computerization
  • Security and continuity
  • Cost and competency
  • Service life


10.You are working as an inspector. While reviewing a tabulation of thickness  data on a section of piping in non-corrosive or very low corrosive service, you  find the initial thickness reading of an inspection point to be 0.432” and marked nominal on a NPS 6 pipe. At the next inspection 12 months later you find a reading by ultrasonics of 0.378” at the same point. Twelve months later UT readings were taken and the thickness at the point was still 0.378” what would this mean to you?

  • No measurement was taken originally, the nominal thickness  was listed and the piping probably had an under-tolerance of 12.5%
  • There was an error made by the inspector at the installation or the inspector who UT” d the piping at the next inspection made an error
  • The UT machine that the inspector used during the 12 month inspection after installation was defective and not reading correctly
  • The pipe contractor or the installer put the wrong schedule piping in service


11.You are working as an inspector. While reviewing a tabulation of thickness data on a section of piping, you find the letter “C” marked under a column headed by the word METHOD. What does the “C” indicate?

  • The  inspection temperature of the pipe was COLD
  • The thickness measurement was made by an inspector with  ID OF “C”
  • The thickness measurement was taken with calipers
  • The thickness measurement was CONFIRMED  by a second party


12.Which of the following is not an important function of an accurate sketch?

  • Assist in determining future locations that urgently require examinations
  • Identifying systems and circuits in terms of location,  size, material etc
  • Serve as field data sheets
  • None of the above


13.The Wenner 4-Pin methods, the soil bar, and the soil box do not represent  methods of determining

  • Holidays
  • Pipe-to-soil potentials
  • Cathodic protection acceptability
  • All of the above


14.The total resistivity for a wenner 4-Pin test that utilizes pins spaced 2 feet apart and a 6 “R” factor is:

  • 2298 ohm/cm
  • 3500 ohm/cm
  • 6000 ohm/cm
  • 8000 ohm/cm


15.Which of the following is not a consideration when using a soil bar?

  • Using a standard prod bar
  • Avoiding the addition of water
  • Applying pressure on the soil bar after injection
  • None of the above


16.Which of the following is a consideration when using a soil box

  • Depth of pins less than 4% of spacing
  • Ensuring the soil has dried out before testing
  • Avoiding contamination of the sample during handling and storage
  • All of the above
QUESTION NO ANSWER
1 C
2 B
3 A
4 A
5 B
6 C
7 C
8 B
9 D
10 A
11 C
12 D
13 D
14 A
15 D
16 C


Third Party Inspection Services

Third Party Inspection Services


Third Party Inspection Services aim at ensuring the supply of materials and equipments of the specified quality and required specifications,as per the client’s requirement.

Your organization wants to show responsibility by making sure that its facilities, equipment, products and services comply with quality, health & safety, environmental and social responsibility imperatives
We are able to carry out inspections of your facilities, equipment and products, and audits of your systems and processes against practically any referential, on a local or worldwide basis. In a number of cases, inspections and audits will ultimately enable us to grant a certification to your organisation.

ESL caters to the following industries for Third Party Inspection Services:

•Oil and gas, power generation and distribution
•Water treatment and distribution
•Pipelines
•Refineries
•Chemicals and petrochemicals
•Fertilizers
•Pharmaceuticals
•Machinery
•Infrastructure
•Telecom
•Transportation

Our inspection team consists of highly professional, multi-disciplinary Engineers, having wide exposure to current national and international standards/codes such as BIS, ASME, ANSI, BS, TEMA, API, DIN, JIS, NEMA, ISO, IEC, IEEE etc., besides being fully conversant with state of the art inspection techniques. Our Inspection Engineers are qualified by various recognized NDT bodies viz., ASNT-UT/MT/PT/RT/LT/ET/VT LEVEL-II , LEVEL-III and ISO-9000 lead Assessors.

COVERAGE:

•Raw material inspection at plate, pipe, forging, casting, fitting etc.,
•Sophisticated reactors, pressure vessels, columns, heat exchangers, reformers
•Clad columns, large capacity storage tanks, mounded tanks.
•Pressure equipments, equipments for combustible / explosive classifications.
•Instrument air/plant air systems, air drying plants.
•Refrigeration plants, ventilation and air conditioning systems, chiller packages.
•Line pipe manufacturing, pipe coating and piping appurtenances.
•Cross country pipelines.
•Rotating machinery such as reciprocating/centrifugal/axial flow compressors, reciprocating/ centrifugal pumps, steam turbines, gas turbines, dual fuel turbines, diesel/petrol/gas engines, turbo generating sets, diesel generating sets, low/medium/high voltage motors.
•P.C.C., M.C.C., P.M.C.C., DCS / PLC, SCADA system & other electric / electronic instruments and control systems.
•Specialized materials such as low temperature carbon steel, low alloy steel, stainless steel, clad steel, duplex stainless steel, monel, inconel, titanium, dissimilar metals, copper and its alloys, aluminium and its alloys, wear resistant materials, refractory materials, wear resistant corrosion resistant coatings, insulation materials, anti-fouling, marine, temperature resistant coatings and paints.

ESL expertise extends to all major Industrial Markets. Special focused markets include:

In Oil & Gas Industry:

ESL experience in the Oil and Gas Industries include Process Plants and Refineries, Chemical Plants, Offshore Structure, NGL, LPG and LNG Plants, Gas gathering, Storage and Distribution System as well as Oil and Gas Transmission Pipelines.

Our Services Overview:

•Design Appraisal and Verification
•Document Verification
•Electrical Equipment Verification / Inspection
•Electrical Installations, Inspection & Verification
•ASME (American Society of Mechanical Engineers) Inspection
•Factory Acceptance Test
•PED Inspection and Audits
•Evaluation of Second Hand (used) Machinery
•Welding Inspection

Inspection and expediting:

•Inspection is carried out in accordance to the rules and guidelines laid down by various Indian and international regulatory bodies such as: ISI, ASTM, ANSI, TEMA, ASME, API, DIN, EC, JIS, etc. Our state-of-the-art testing procedures and expertise of our highly qualified personnel allow detection of the defects at an early stage, thus saving time, energy and money.

ESL offers a wide range of services covering all aspects of inspection. Our services include:

•Vendor assessment and pre-qualification for project procurement
•Engineering design review
•Shop and site inspection involving stage and final inspection
•Witnessing performance tests
•Pre-shipment inspection
•Qualification of welding procedures and welders
•NDT personnel qualification
•Certification of materials and welding consumables
•Health assessment of the plant
•Piping and machinery
•Periodic inspection of lifting equipment
•Process piping and inspection during plant turnaround
•Assessment of corrosion and erosion of the plant

Vendor Inspections:

•ESL has a strong team of Vendor & QA/QC Inspectors experienced across a range of disciplines including all types of mechanical equipment as well as welding, coatings and all Engineering products. Our inspectors can be embedded within our clients project teams or used on an ad-hoc basis to carry out visual, witness and certification inspections in accordance with ESL and client procedures either at site, vendor or client premises. We are also able to provide dedicated inspectors for specific types of inspections requiring specialist knowledge.

ESL provides excellent Third Party Inspection Services on all kind of Welding Inspections and Testing like:

•Visual Examination (All stages)
•Preparing and Reviewing Welding Procedure Specification (WPS)
•Preparing and Reviewing Procedure Qualification Record (PQR)
•Welder/Welding Operator Performance Qualification (WPQ) & Certification
•Witnessing & Reviewing Destruction Testing (DT)
•Witnessing & Reviewing Non Destruction Testing (NDT)

Coating Inspections:

ESL provides third party on-site inspection services, corrosion surveys for quality assurance and failure analysis of coatings and metallic structures. Our experience includes all kind of Coating Processes for Industrial Structures, Equipment and pipelines from Installation (blasting) to Final stage (Final coat after curing).

Third Party Witnessing:

We offer all kinds of Witness Testing like,

•Pre inspection meetings.
•Pre fabrication Vendor document reviews.
•Fabrication and Welding Inspection.
•Dimensional Inspection.
•Visual welding Inspection.
•Final Inspection.
•Pressure test
•Bolt & Nut Torque Test
•Leak Test Etc
•Coating Inspection.
•MDR reviews.

Thanks for your prompt attention . I look forward to hear from you soon.

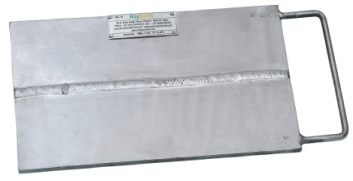
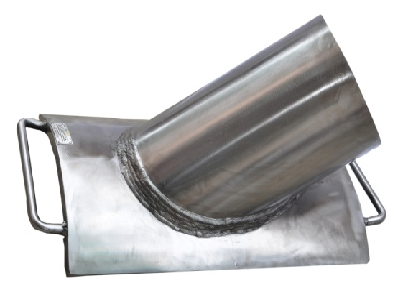
NDT Flaw Specimen

ESL INDUSTRIAL SUPPORT SERVICES have developed NDT Flaw Specimen for over 2 years now in a wide variety of specimen sizes, geometries and alloy types. Our specimens are exported worldwide for training, examination and operator/technique validations in all NDT methods.NDT Flaw specimens

ESL’s NDT flaw specimen contain both surface breaking and internal flaws that very closely mimic a real flaw, which can be accurately positioned and sized with the designated NDT technique. Each specimen is supplied with a detailed flaw map showing type, size, and position and populous of all indications. For examination purposes two independent reports can be supplied in line with PCN examination requirements.

NDT Flaw Specimen


NDT Flaw Specimen The NDT Flaw Specimen that ESL creates for the global NDE industry are specifically designed with precise flaw placement in a wide variety of specimen geometries and alloy types. ESL specimens are used in various industries to facilitate the education, practice and procedure development of equipment and NDE technicians. ESL INDUSTRIAL SUPPORT SERVICES is a manufacturer of high quality flawed weld specimens for the global NDE and pressure equipment construction and maintenance industries. Our NDT flawed specimens are used for NDE training, personnel qualification, procedure qualification and procedure demonstration in accordance with ASME, API, CSA and other codes, specifications and standards.

High quality flaws are achieved by a combination of first class workmanship, a unique blend of welding and non-destructive testing skills, plus a full understanding of the product. Flawed specimens contain purposely induced real flaws which are accurately sized and located. Each specimen is supplied with documentation detailing flaw types, sizes and location. Our policy of setting new standards and developing new techniques to improve quality and reliability, assures the highest quality of flaws.

We have specifically developed our business processes to enable us to satisfy the quality requirements and time constraints faced by our clients. Our primary focus is on exceptional flawed specimen quality, flaw sizing accuracy and timely delivery.

To Know more

https://esltraining.in/sales/salesflawed-specimens/

For Enquiry please click the below link

esl@esltraining.in

Third party inspection services

Third party inspection services refers to independent inspection services that are provided by inspection agencies. ESL Industrial Support Services provides Technical Inspection, Verification, Testing and Conformity Assessment for Industrial Markets. The core values of complete independence, transparency and integrity guide us in our mission to deliver first-class services on a constant high quality level to customers around India. Our Teams of Engineers ensure that the quality and performance of products or installations meet applicable requirements, whether they are regulatory, voluntary or client specific. We help to improve the integrity, quality and efficiency of equipment, assure safe and health working conditions for employees and minimize the environmental impact of industrial activities.

Our Services are divided into:

  • Industrial Training
  • Industrial Equipment Sales
  • Third party inspection services
  • Engineering Consultancy

Technical Manpower Placement Assistances

We are highly specialized in providing Technical Manpower for various kinds of project activities, Maintenance, Procurement, Engineering, Manufacturing, Operation and Maintenance etc.

We have been specialized into technical manpower for various applications like :

  • Construction Activity
  • Project Planning
  • Project Engineering
  • Quality Control
  • Safety
  • Procurement
  • Detail Engineering
  • Basic Design Engineering
  • Site Supervision
  • Site Survey
  • Third party inspection services
  • Commissioning Activities
  • Pre Commissioning Activities
  • Plant Maintenance
  • Operation and Maintenance Activities
  • Piping inspection technology.
  • Welder training
  • NDT training and certifications
  • ASME and API code knowledge
  • Welding Procedure Specification as per ASME SEC IX
  • Welder Performance Qualification as per ASME SEC IX
  • NDT,QC procedure making and updation as per codes and standards.
  • Failure analysis
  • NDT and inspection for PT,MT,UT
  • QA/QC consultant services
  • ISO Consultant services
  • Class on QA/QC
  • API-510,570 preparatory
  • CSWIP 3.1,3.2,3.2.2 welding inspector, senior welding inspector preparatory classes
  • BGAS Painting inspector preparatory classes
  • NDT Manpower

We are providing the services in various field of Non-Destructive Testing, Stress Relieving, Metallurgical Testing and Quality Control/Inspection activities during Plant Shutdown, Construction works, Fabrication Works and also in Maintenance Activities etc.

Third party inspection services

Third Party Inspection refers to independent inspection services that are provided by inspection agencies.

Our Third Party Inspection Services

Third Party Inspection Services for Fix Equipment:

  • Water tube boilers,
  • Fire Tube Boiler,
  • Shell and Tube Heat Exchangers,
  • Fin Tube Heat Exchangers,
  • Pressure Vessel,
  • Storage tanks,
  • Line pipe,
  • Steel Structure,
  • Valves

Third Party Inspection Services for Rotary Equipment:

  • Reciprocating Compressor,
  • Centrifugal pumps,
  • Gas Turbine,
  • Steam Turbine,
  • Fan and Blower,
  • Centrifugal Compressor

Quality Policy

 Quality is an on -going process of building and sustaining relationships by assessing, anticipating and fulfilling sustaining and/or implied needs.

“Quality is doing right things when no one is looking”

-Henry Ford

Quality is not an act, it is a habit. It is everyone’s responsibility. Our Team of Engineers is responsible for the quality inspection we provide to your products. We are committed ourselves to inspect and evaluate the quality by providing Non-Destructive Testing and Third party inspection services that meets our customer’s requirements through the continuous improvement of our processes.

Our employees are insisted totally to commit for quality performance and intends to conduct our professional ethics in a responsible manner.

Our aim is to be the total excellent NDT Provider to our customers in Manufacturing, Fabrication, Heavy Industries, Oil and Gas, Petro-Chemicals, Heat exchangers, Pressure Equipment, Civil, Power Sector, Weldments and many more.

Profits are the result, the by-product of great service.

First party inspection refers to quality control activities that are done by equipment vendors or sellers. Second party inspection refers to inspection activities that are done by equipment buyers or purchasers. In fact first party is seller and second party is buyer. So when you say second party inspection, it means that an inspection and quality control activities that are done by a buyer and when you say first party inspection, it means that an inspection and quality check that are done by a vendor in its construction shop. These quality controls and inspections are done based on Performa Invoice, Purchase Order and International standards.

Third party inspection services refer to independent inspection activities that are done by a Third Party Inspection Agency either hired by a buyer or seller.

Contact Us

https://esltraining.in/contact-us/