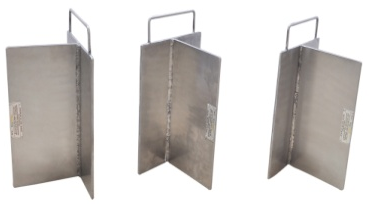
FLAWED SPECIMEN
NDT FLAWED SPECIMENS
NDT Flawed Specimens for training, practice and qualification ie ASNT-TC-lA, PCN,EN473, API and others Owing to the rich industrial experience, we are involved in manufacturing of a wide assortment of Flawed Specimen. Offered Flawed Specimen is used to practical procedure, personnel qualification and equipment development.
High quality flaws are achieved by a combination of first class workmanship, a unique blend of welding and non-destructive testing skills, plus a full understanding of the product. Flawed specimens contain purposely induced real flaws which are accurately sized and located. Each specimen is supplied with documentation detailing flaw types, sizes and location
Magnetic particle testing:
Method description:
Magnetic particle testing is one of the very common NDT methods. The main application is in the automotive and aerospace industry, and also in energetics and transportation industry. Due to simple physical background this method is easy to perform and it is very often required during the maintenance of the plant. MT is able to detect the surface and sub-surface imperfections (cracks, porosity, inclusions etc.) in the ferromagnetic (Fe) material. For other materials (non-ferromagnetic) MT is not applicable.
Physical background:
The ferromagnetic material becomes magnetically saturated if it is magnetized in a proper way. The material discontinuity has different magnetic properties (usually is non-magnetic – air inside of the crack, slug or gas in porosity). This inhomogeneity of the magnetic properties deforms magnetic field, its force lines step off the material to surface, and create the scatter magnetic flow. This flow holds the information about magnetic inhomogeneity. The magnetic powder is applied on the surface of the material. This powder is in place of the material magnetic properties fitted to the surface by the scattered magnetic flow. This fitted cluster of magnetic powder creates an indication. The indications have bright or colour contrast and could be easily seen on the background material. The MT is able to detect the imperfections from width of a few microns.
Defect Vs Flaw Vs Discontinuity:
This issue of semantics came up in another thread. It is one which has been much discussed in some groups I participate in. It has also been addressed by ASNT for example, who require use of the word “discontinuity” in their publications.
In my current opinion, which has evolved over time (covering up for use of words defect and flaw in previous papers of mine), the appropriate terminology is “discontinuity”. The words “defect” and “flaw” imply that there is a some judgement made as to the serviceability of the object under inspection, if an object contains defects or flaws, is it not defective or flawed, and therefore unfit for service?
It is in fact NOT the role of the inspector to determine whether an object under inspection is fit for service. The inspector performs an inspection, which may yield indications of discontinuities in the object under test. It is the role of the structural engineer to provide the guidelines by which this indication is interpreted to determine fitness for service.
Discontinuities exist in all materials, as noted by another poster in the previous thread. Some are beneficial, alloying elements for example. Some are benign under the expected usage of the object under inspection, therefore are not “defects”.


