VISUAL TESTING
Visual Testing:
Introduction:
Based on the principle of illuminating the object by light in the visible region of the electro magnetic wave spectrum.
One of the first, natural, methods of testing of anything we use is visual testing. Prerequisites:
- Eye – The sensor;
- Light – The probing medium.
Requirements:
- Testing of the vision of the inspector, measurement with a light meter of the light falling on the specimen and establishing the actual ability to see the area being inspected.
- Refer the code for the specifications.
Eye:
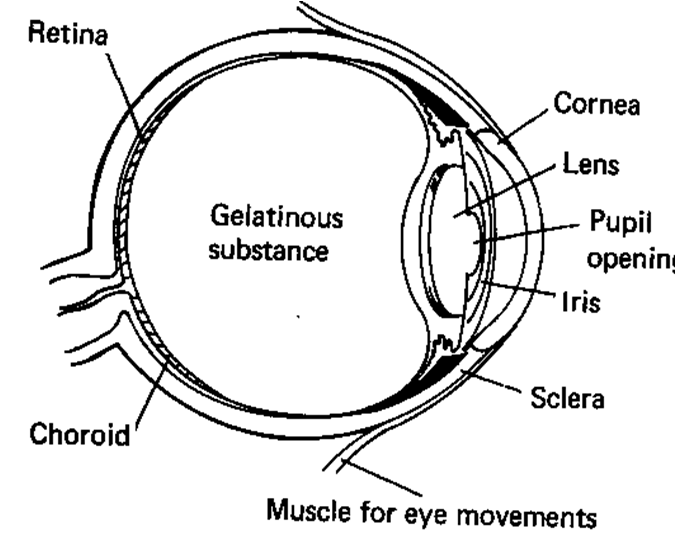
Calibration of Eye:
- Near Vision Acuity;
- Colour blindness.
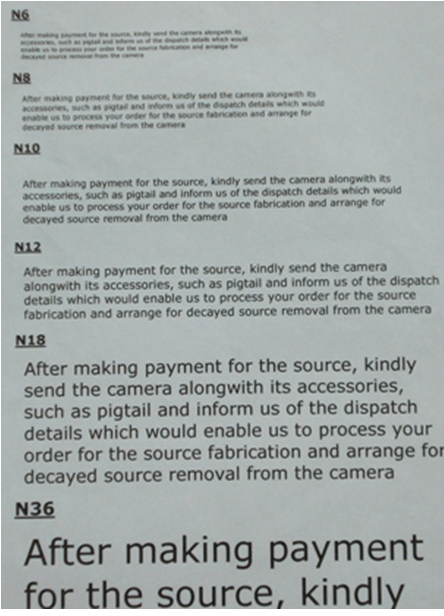
Near Vision Acuity Chart:
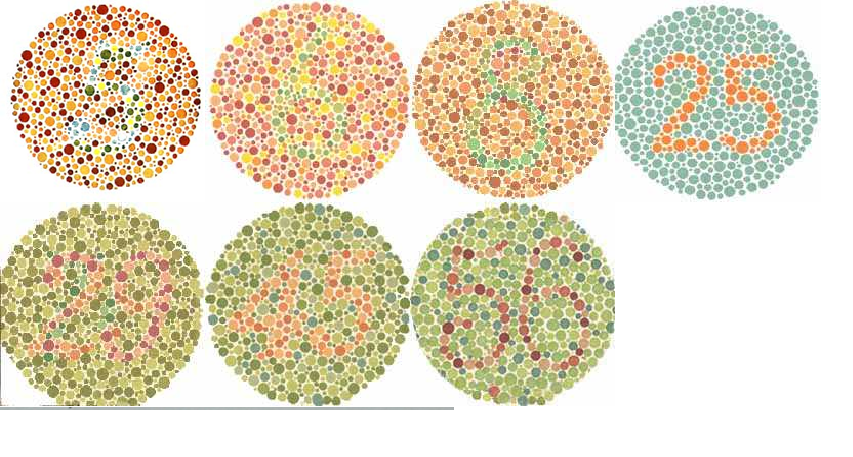
 Ishihara Chart:
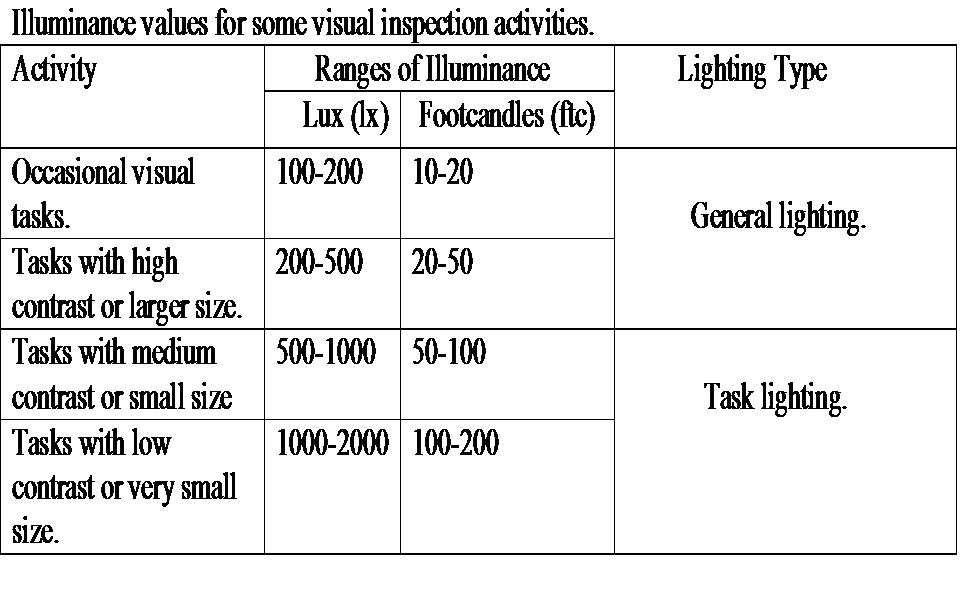
 Lighting:
 Steps:
- Clean the test object sufficient enough to observe the details.
- Keep it in a well illuminated space – generally 800 – 1000 lux.
- Inspect the object by eye or by light sensitive devices such as photocells.
Aids for visual testing:
- Mechanical aids;
- Optical aids.
Mechanical Aids:
- Measuring rules & tapes;
- Calipers & micrometers;
- Squares and angle measuring devices;
- Thread, pitch and thickness gages;
- Level gages (liquid & laser) and plumb lines;
- A variety of weld gages.
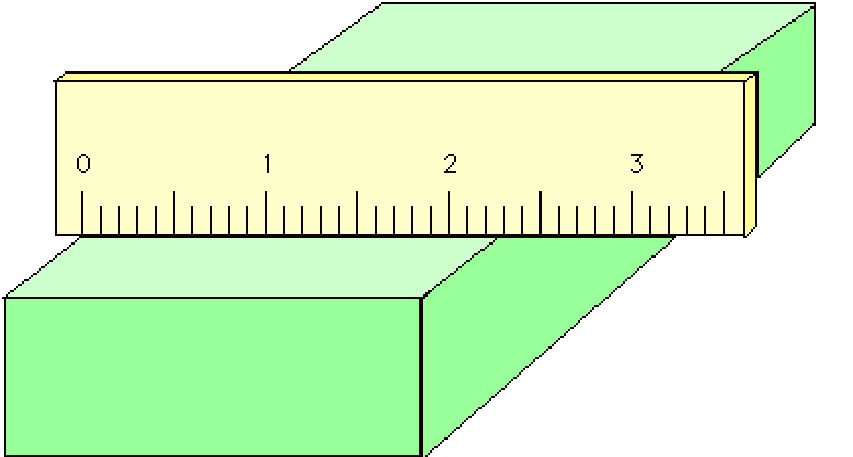
Scale: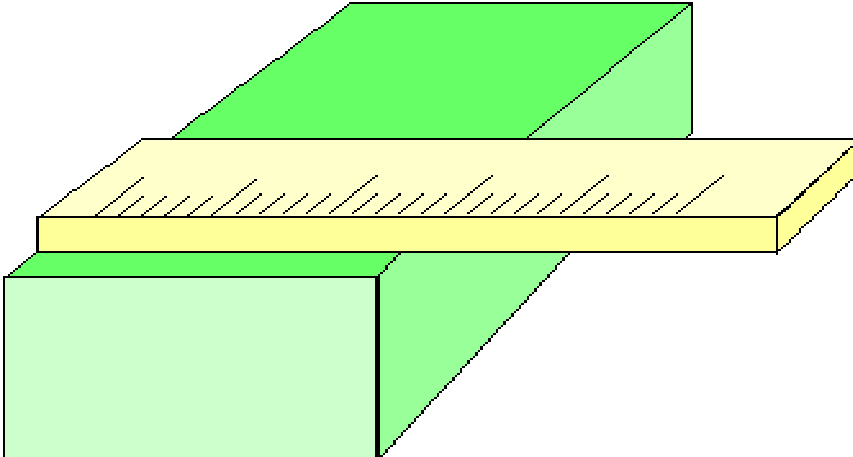
Parallax Error:

Correct Usage:
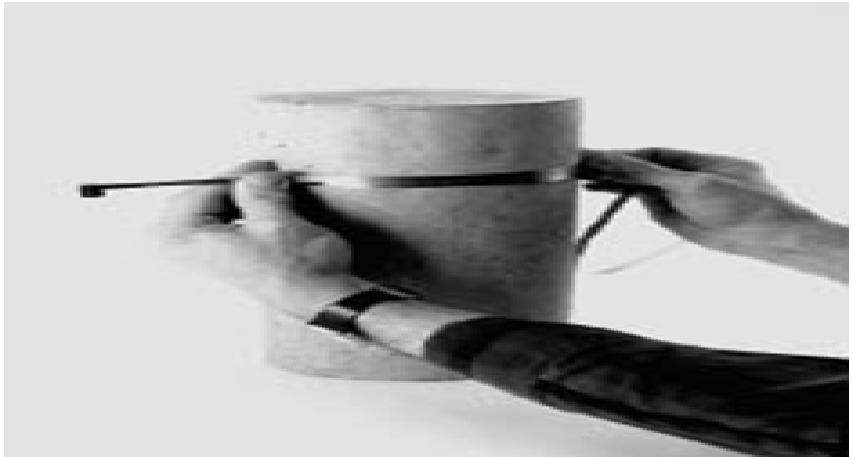
PI Tape:
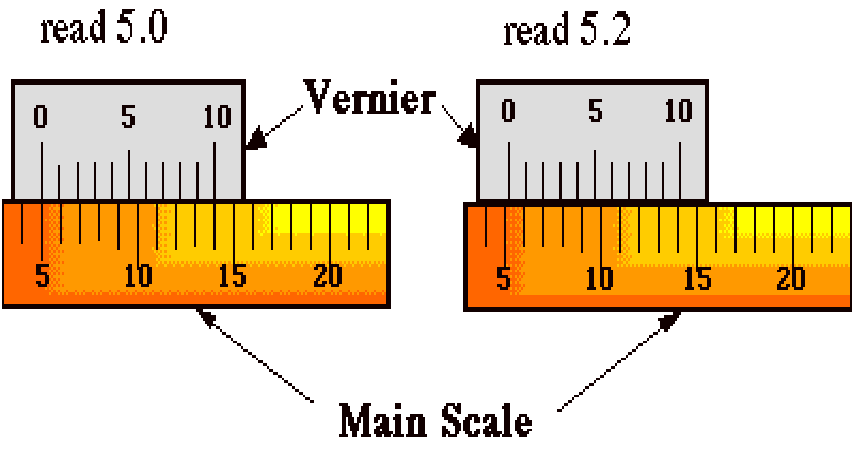
Vernier Scale:
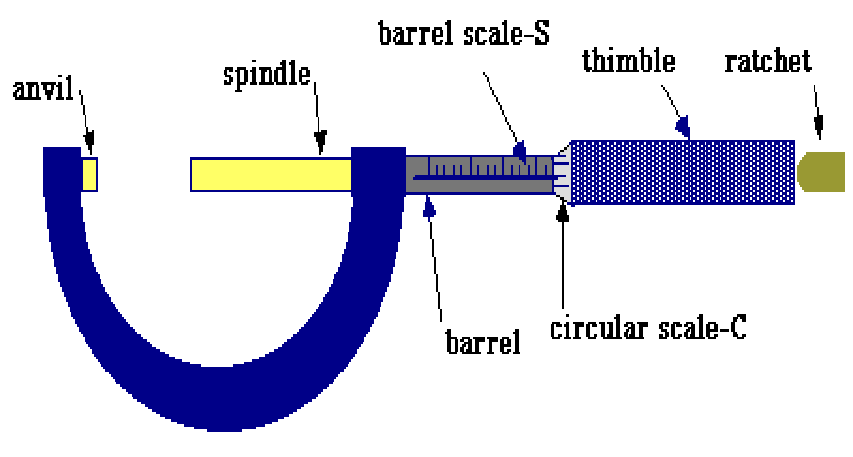
 Micrometer:
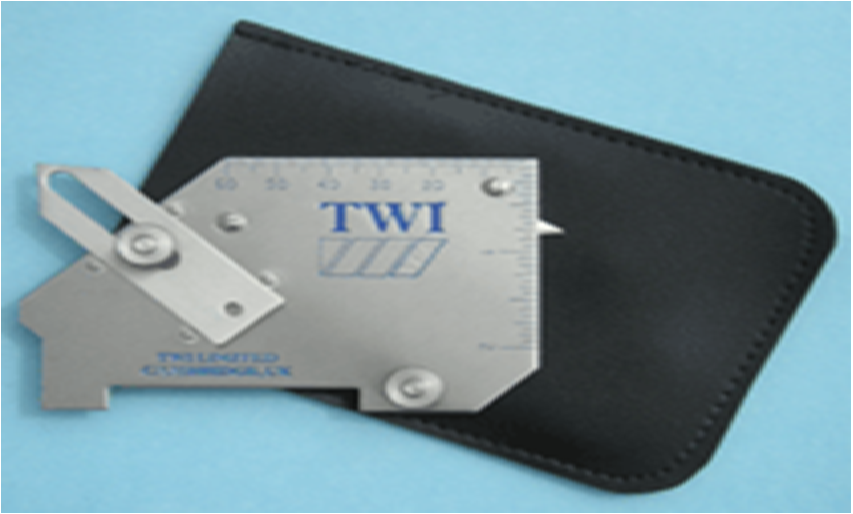
 Weld Gauge:
 Optical aids for visual testing:
- Mirrors (especially small, angled mirrors);
- Magnifying glasses, eye loupes, multilens magnifiers, measuring magnifiers;
- Microscopes (optical and electron);
- Optical flats (for surface flatness measurement);
- Borescopes and fiber optic borescopes;
- Optical comparators;
- Photographic records;
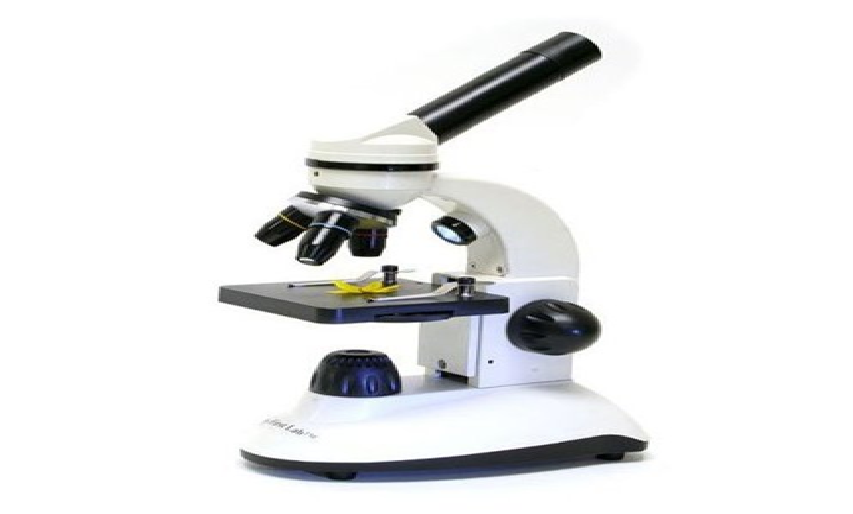
Microscope:
 Magnifying Lens:
 Optical aids for visual testing:
- Closed circuit television (CCTV) systems (alone and coupled to borescopes/microscopes);
- Machine vision systems;
- Positioning and transport systems (often used with CCTV systems);
- Image enhancement (computer analysis and enhancement).
Enhancement Techniques in visual testing:
- 1. Microscope.
- 2. Borescope.
- 3. Endoscope.
- 4. Flexible Fibre-Optic Borescope (Flexiscope).
- 5. Telescope.
- 6. Holography.
Application in visual testing:
- Everywhere and anywhere.
- Also before conducting any NDT.
- Least expensive of all NDT methods.
- Permanent records are possible with the help of camera.
Advantages of visual testing:
- Simplicity;
- Rapidity;
- Low cost;
- Minimal training;
- Minimal equipment requirements;
- Ability to be performed while the specimen is being used or processed.
- In many cases will eliminate the need for the need for more sophisticated NDT.
Limitation of visual testing:
- Can be applied to surface discontinuities only.
- Least sensitive of all NDT methods.
- The poor and variable resolution of the eye, fatigue of the inspector, distractions and hence heavily dependant on the inspector.
- In some cases cost of the visual aids (equipments) can be very high.